
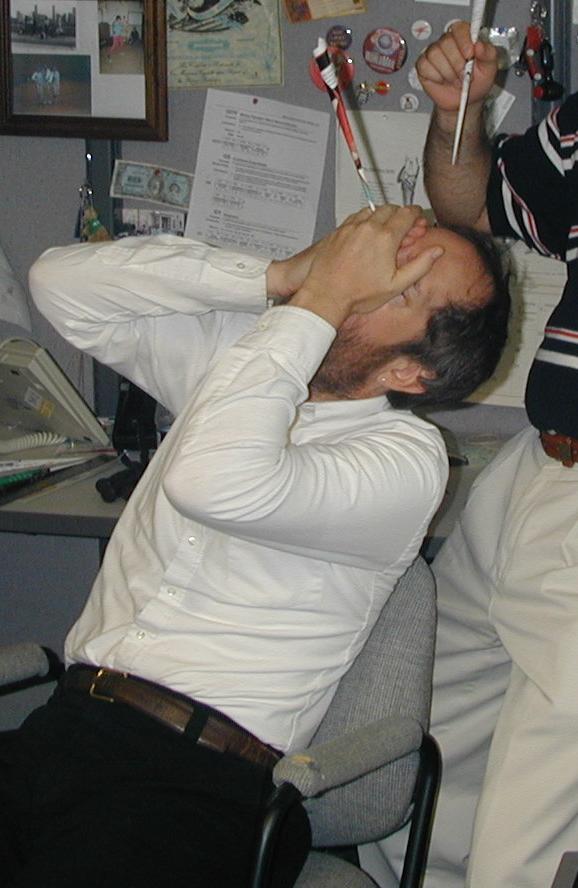
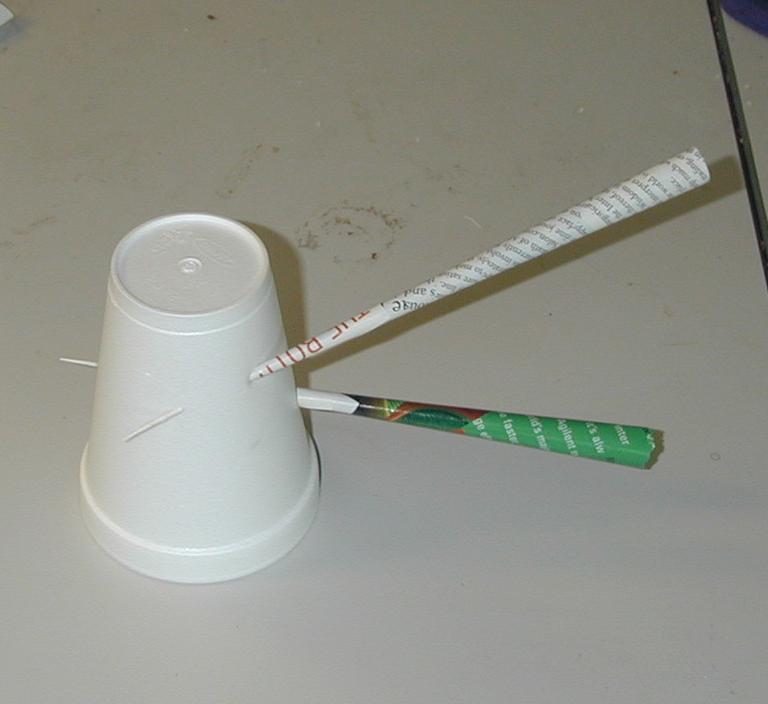
Paper blowpipe darts are cheap, fun, and relatively safe. A good paper dart will fly 90 feet (27 meters) straight up, yet it is light and slow enough to have battles among your friends as long as you're wearing eye protection. You can also build paper darts with warheads for target practice or hunting. I've reliably measured the muzzle velocity of a paper dart blowpipe at between 65 and 70 MPH (96-112 KM/H); this is quick enough to penetrate both sides of a styrofoam cup.
You can learn to roll paper darts in just an evening or two. Once you pick this trick up, you won't forget it. After you are proficient, rolling a good dart should take no more than thirty seconds. Although even the most experienced dart makers occasionally muff one, you should be able to turn out good darts from 90 percent of your attempts after about three hours of assiduous practice.
Launch paper darts through a simple blowpipe. The person who taught me used 3/4 inch (19 mm) diameter Aluminum electrical conduit, but I have found that a 3 foot (1 meter) length of 1/2 inch (12 mm) diameter hard-drawn copper tubing shoots significantly farther. Be sure to specify hard-drawn tubing; soft copper tubing bends easily and will not stay straight. Such a thing will cost about $3 at your local hardware store. Grind or shape both ends smooth on the inside; copper pipe cutters tend to crush the tube, and you must remove the lip they create. Cover one end of the tube with a band-aid or electrical tape -- copper is not particularly toxic, but its salts can be. You can jazz up your blowpipe with slings, covers, quivers, and other accessories, but it's not necessary. I have experimented with longer (4 foot/1.2 meter) and smaller (3/8 inch/9.5mm) copper tubing and mouthpieces, but so far my results have not been significantly better than the setup I recommend.
Paper darts start with the proper paper. High-kaolin coated magazine paper is best. Newsweek, Time, and other mass-market magazines are ideal. Upper-market magazines, such as Scientific American or Interview, tend to use heavier stock which is more difficult to work. Your paper must be slick and hard, but relatively lightweight. Wood papers such as newsprint -- even the coated newsprint which Sunday newspaper magazines use -- are unsuitable. After you're attuned to the process, you will discover that not all magazine pages are alike. Pages which have color photographs on both sides tend to be a little heavier. These pages are slightly more difficult to roll into darts, so if you are just starting out you may wish to discard them. Discard the cover of the magazine and any cardboard pages you find.
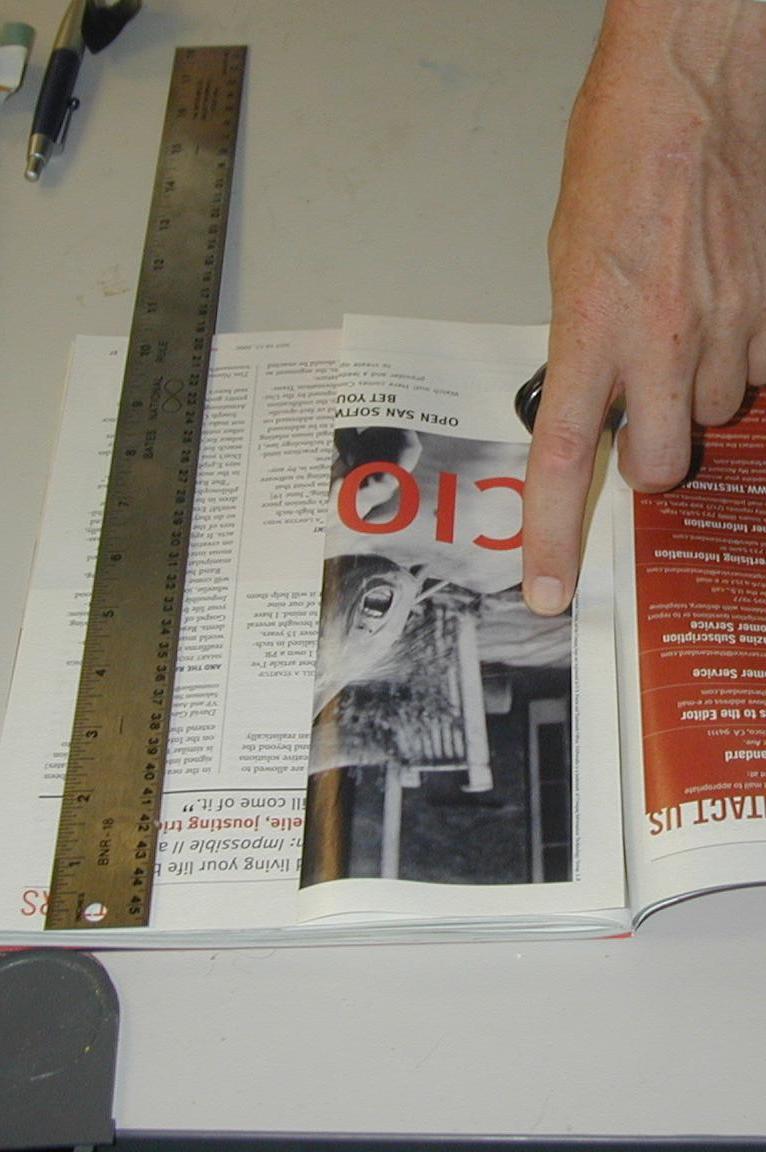
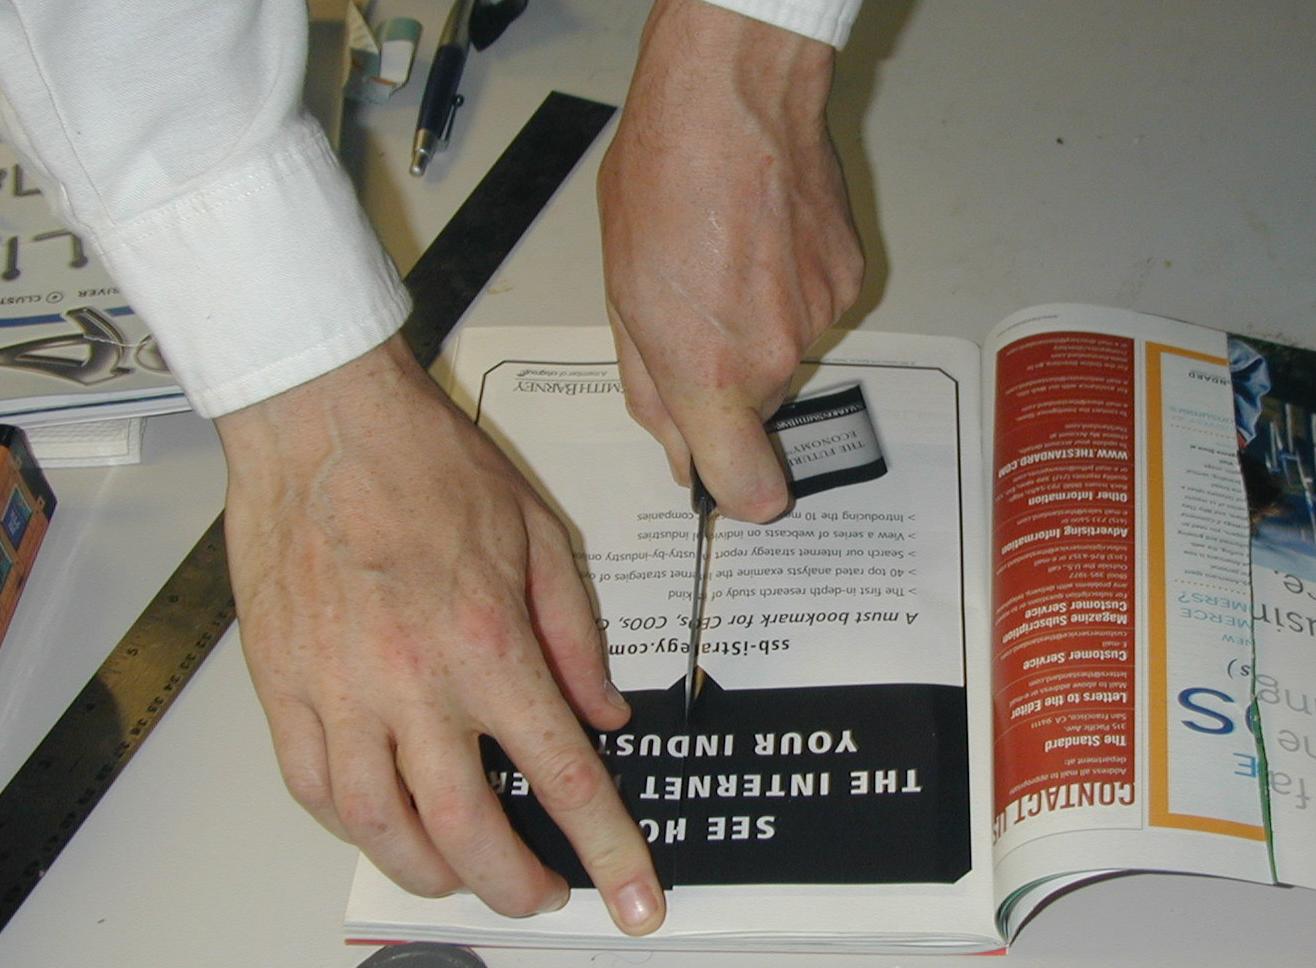
Darts start from dart blanks. These are half-pages from your magazine, cut along the long axis. Use a knife or a heavy pair of scissors to cut several at once. Each magazine page is good for two blanks. If you are very fastidious, you can use a paper knife to make perfect cuts; otherwise, blanks cut from the outside edge of the page are marginally easier to work with. It's easiest to digest an entire magazine into blanks, then hold them together with a large binder clip. This is convenient to carry around, yet gives you a big reservoir of ammunition.
I am personally of 'mixed dominance', which means that I do some things (such as write or shoot) left-handed and some things (such as throw) right-handed. My right-handed friends and relations roll darts exactly as described below, so I suspect that these directions are right-handed. But I'm the only living one among us who has seen a stranger roll a dart, and that was 30 years ago. You may have to try it in both directions and pick the way which feels most comfortable; both your hands work about equally hard when you roll a dart.
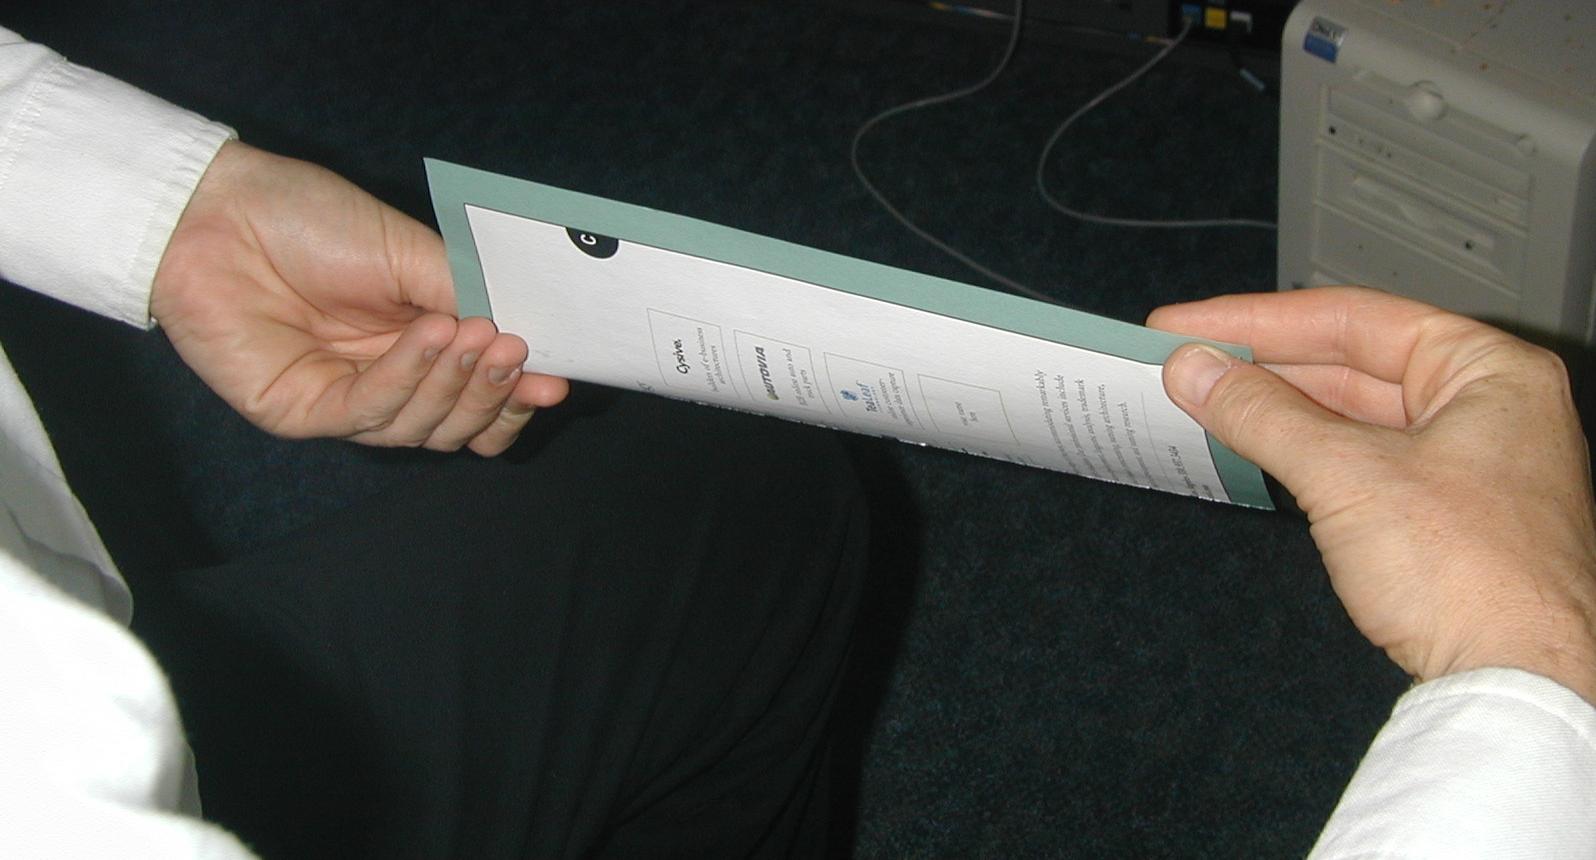
Start the dart with the straightest edge of the blank on top. This makes rolling it a little bit easier. If the blank is not cut perfectly straight, put the bigger end toward your left. Grasp the blank between the tip of your thumb and the index and middle fingers of your right hand at its upper right corner, keeping your grasping fingers straight. Turn your left hand palm up and grasp the lower left corner of the blank with your thumb and two fingers, so that your thumb is on the side of the blank which is away from your body. Now bring your left hand away from your body and above your right hand, turning your left hand palm down as you go. This should form a loose fold around your right two fingers with the rest of the blank still held out straight between your hands. At this point the lower right corner of the blank should be exactly above the division of your two right fingers, while you are still holding the upper right corner inside the little cone you have created.
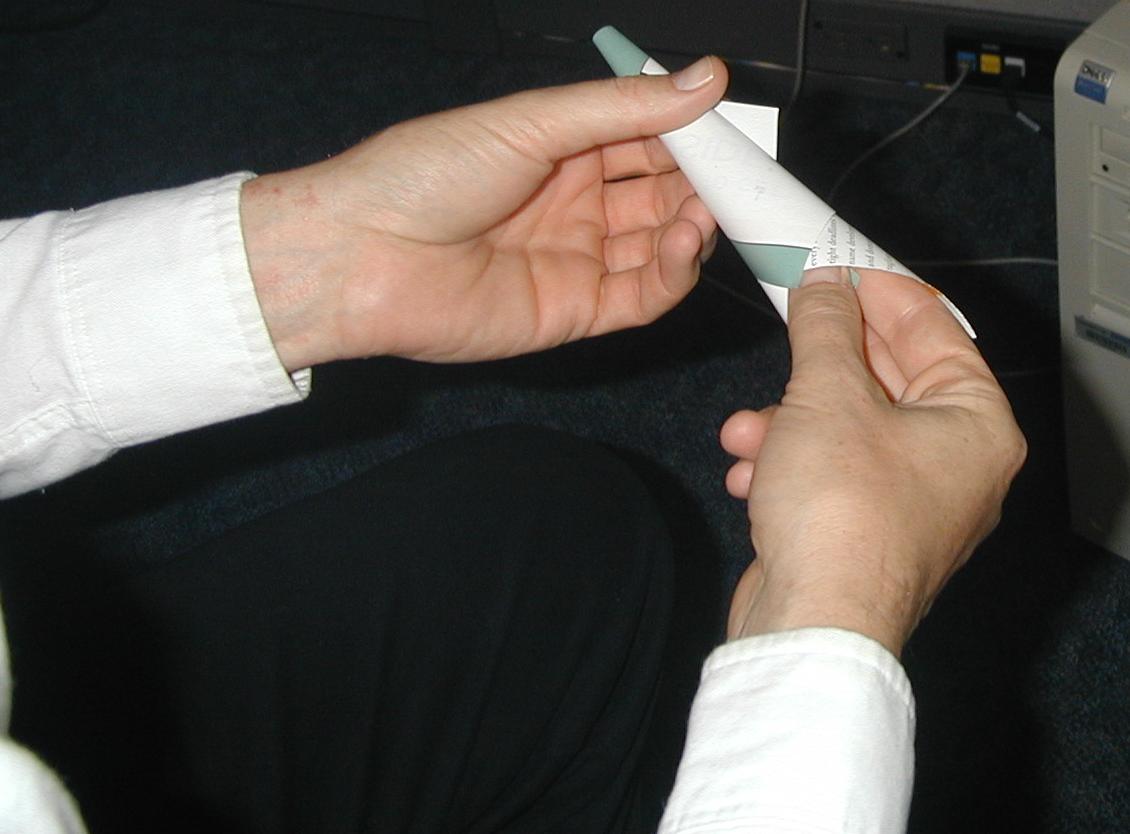
Roll the rest of the blank around your right two fingers and thumb to create a loose cone. This is the most subtle point in rolling a dart, because the size and shape of the starting cone dictates how the finished dart will look. Darts that I roll have about a quarter-inch (6 mm) aperture at the sharp end of this beginning cone, which is comprised of about three turns of paper. The lower right corner of the blank moves slightly to rest above my right index finger's knuckle, and the base of the cone just covers the tip of my right thumb.
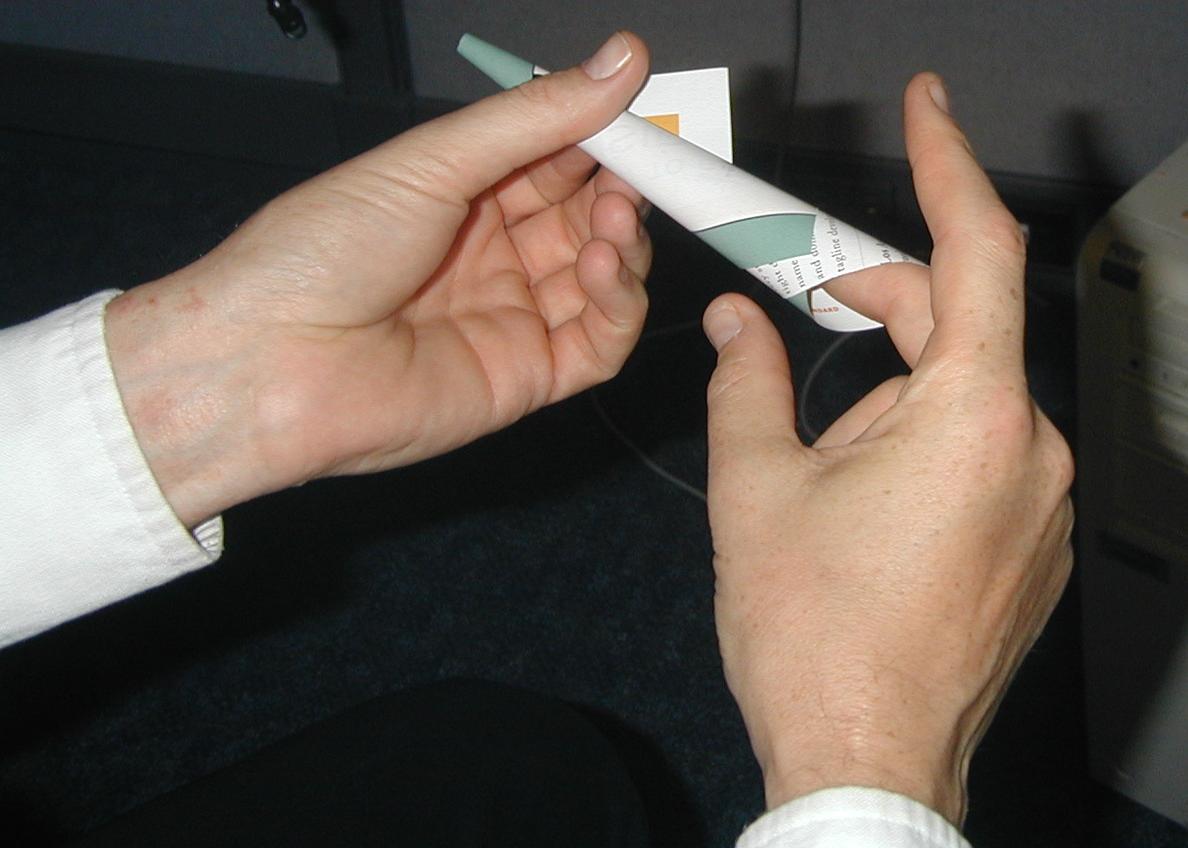
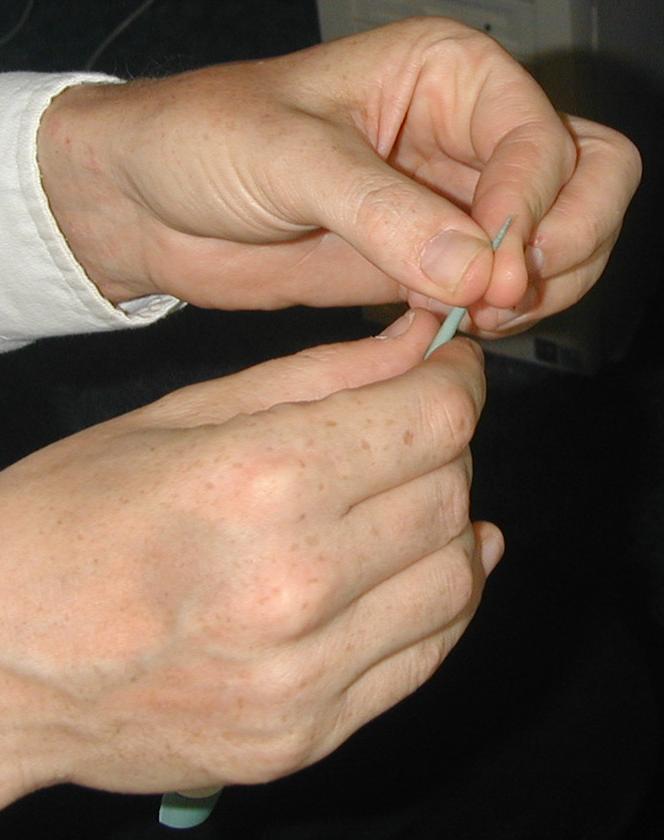
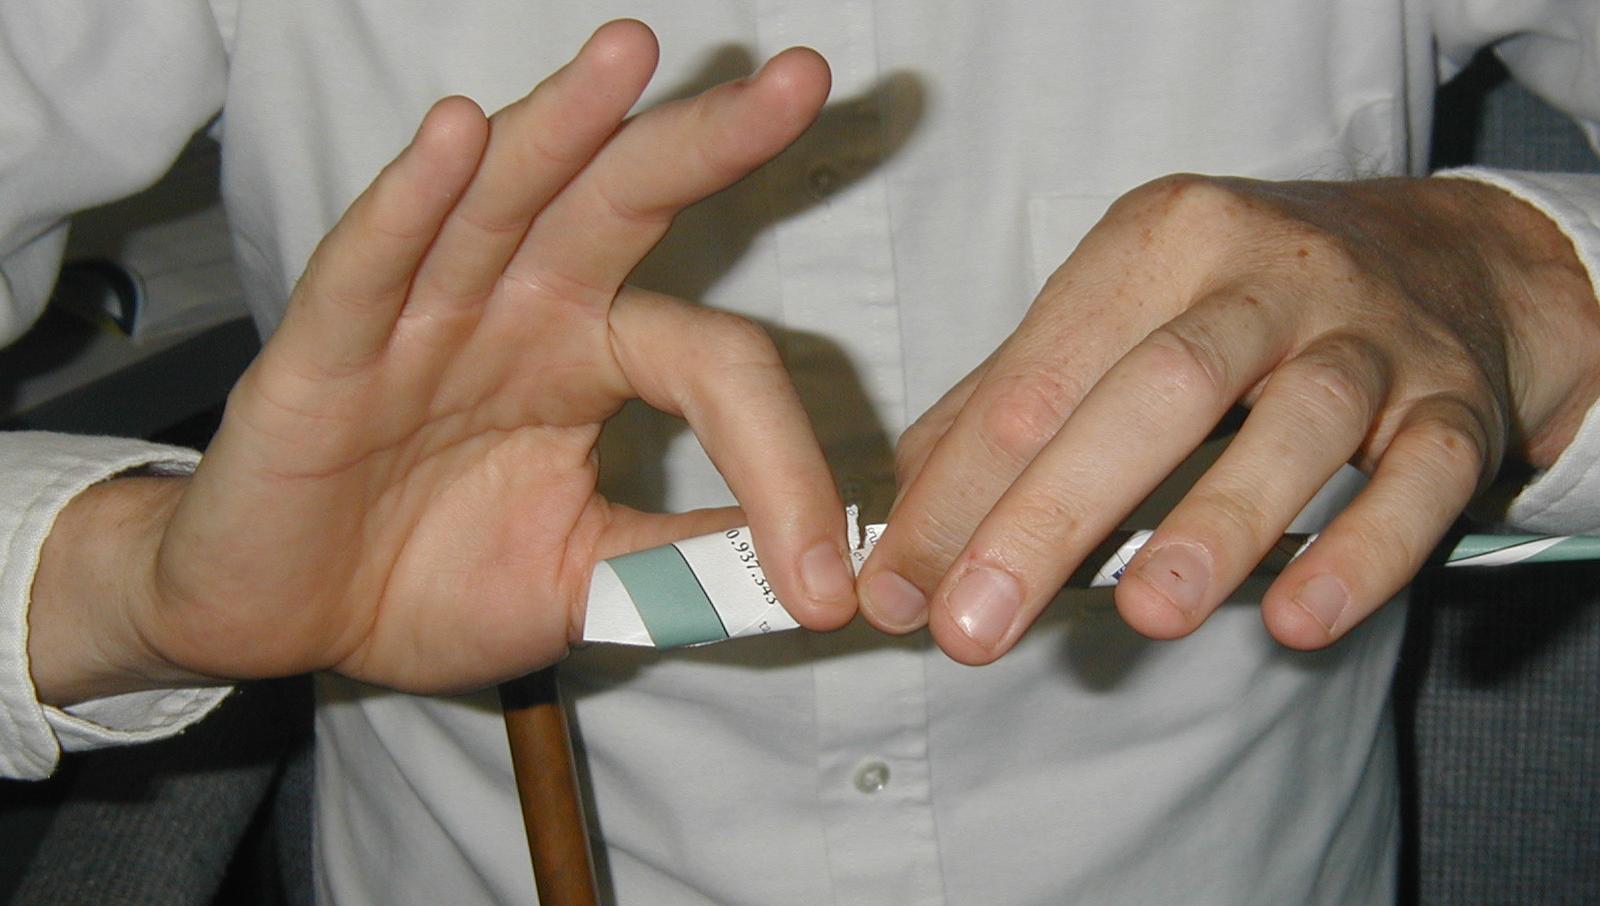
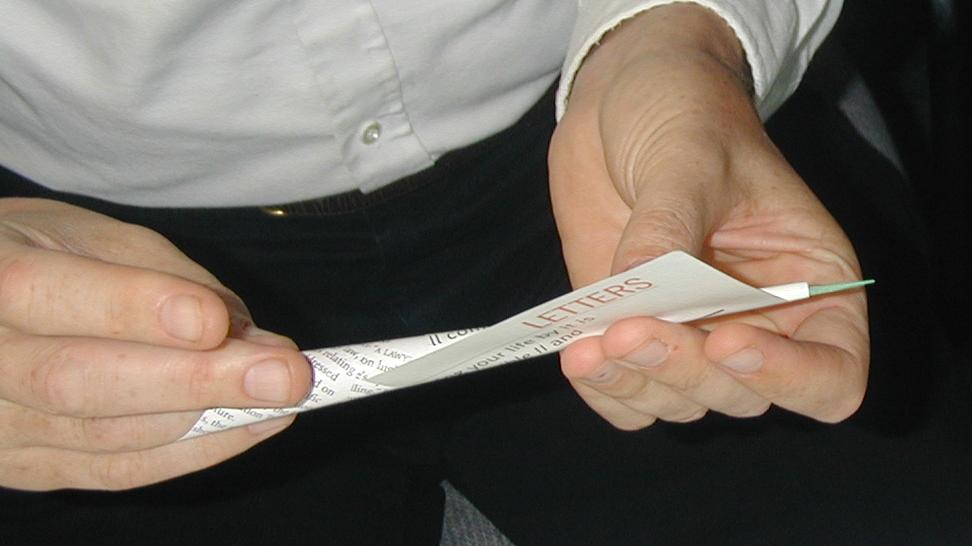
Now you are ready to pull the dart to its finished form. Hold the cone in shape with your left hand and shift your right-hand grip so you are holding the near side of the base of the cone between one finger and your thumb, then pull gently to the left to extend and tighten the paper cone. Continue this process until the tip rolls down very tightly. I like to keep my middle or second finger on the corner I originally grasped, which should be just inside the large end of the dart, during this process. By sliding it to your right against the inside of the cone, you can make the dart as long and narrow as possible. This helps make your dart more stable in the air. When you have properly completed this step, both of the left-hand corners of your original blank should be visible above the tightly rolled tip of the dart, on a flap about an inch long extending at 90 degrees from it. Apply gentle tension here -- if I let go of the paper at this stage, it will expand but loosely hold its shape.
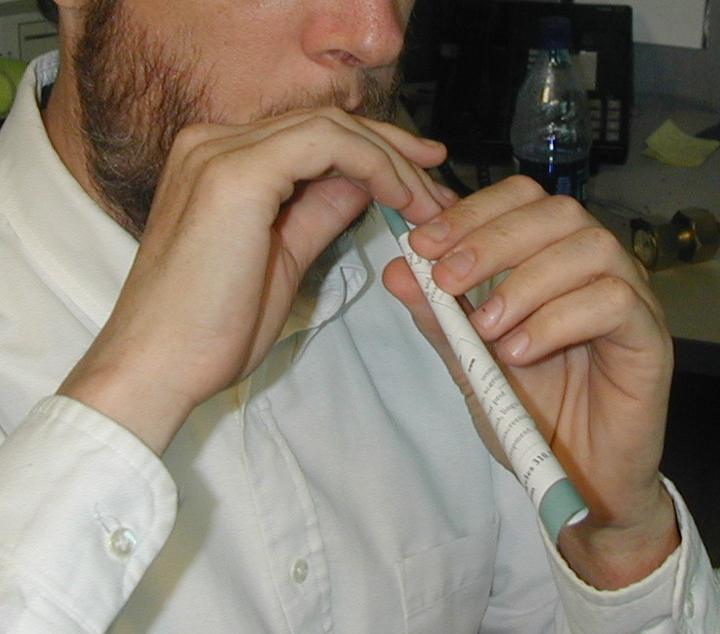
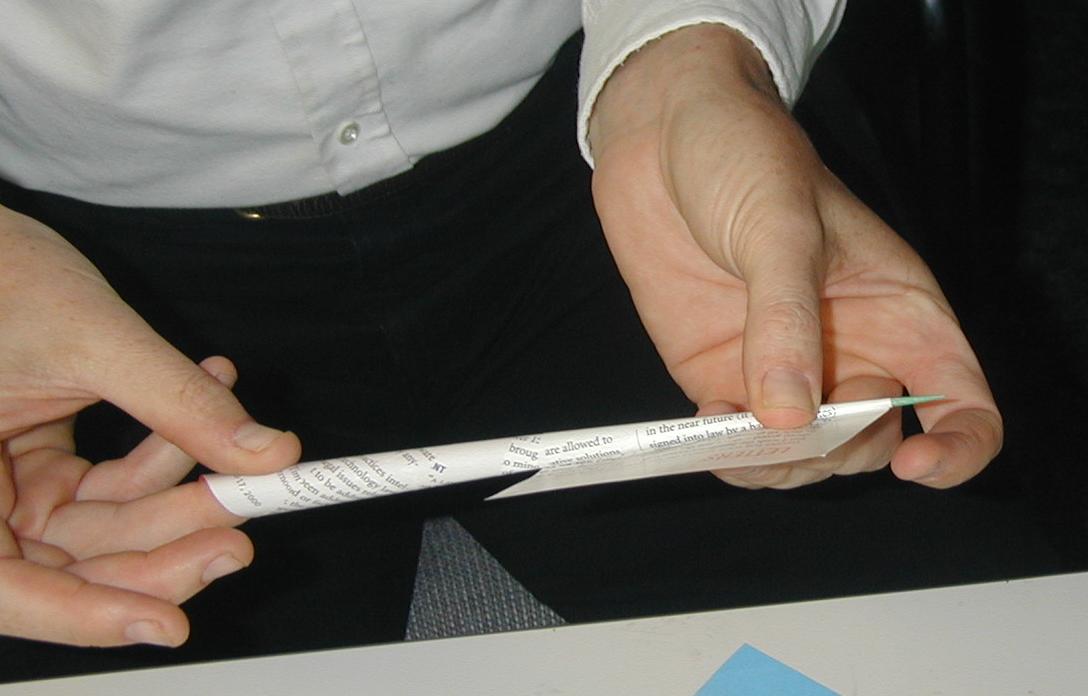
Now all that's necessary is to wet the flap you have created with your tongue and finish the tip by rotating the dart counter-clockwise in your mouth. Press the forming tip against your teeth with your tongue to ensure that the paper welds properly. You may have to smooth the flap down a little bit between your fingers as well.
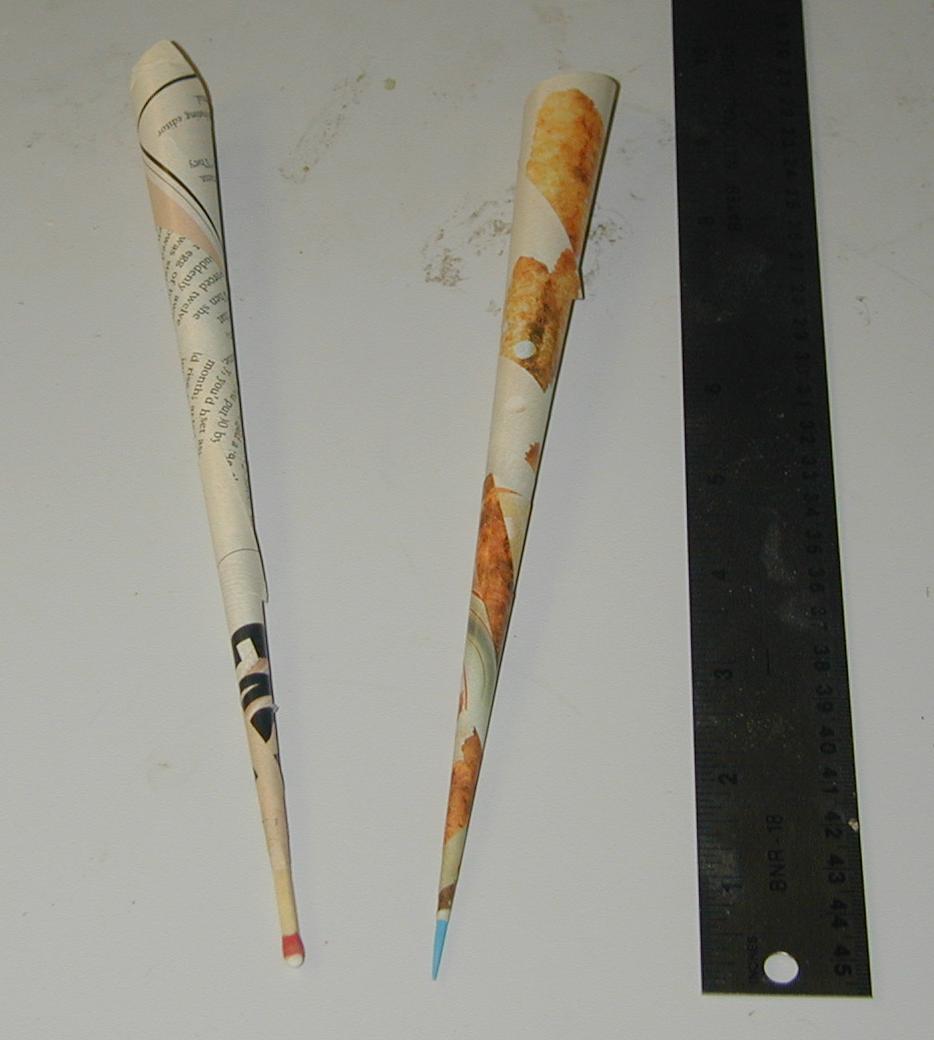
The finished dart should be close to 10 inches (25 cm) from bottom to tip, with a diameter of about 3/4" (2 cm) at the large end and 1/32 inch (1 mm) or less at the small end. No hole should be visible in the tip, even if you hold the dart to the light and look through the big end. A properly rolled dart is under tension between the welded end and the tendency of the paper to unroll. This makes it quite strong. If you set the dart aside for two or three minutes to let it dry, the tip should make a distinct click if tapped against a window or a desk.
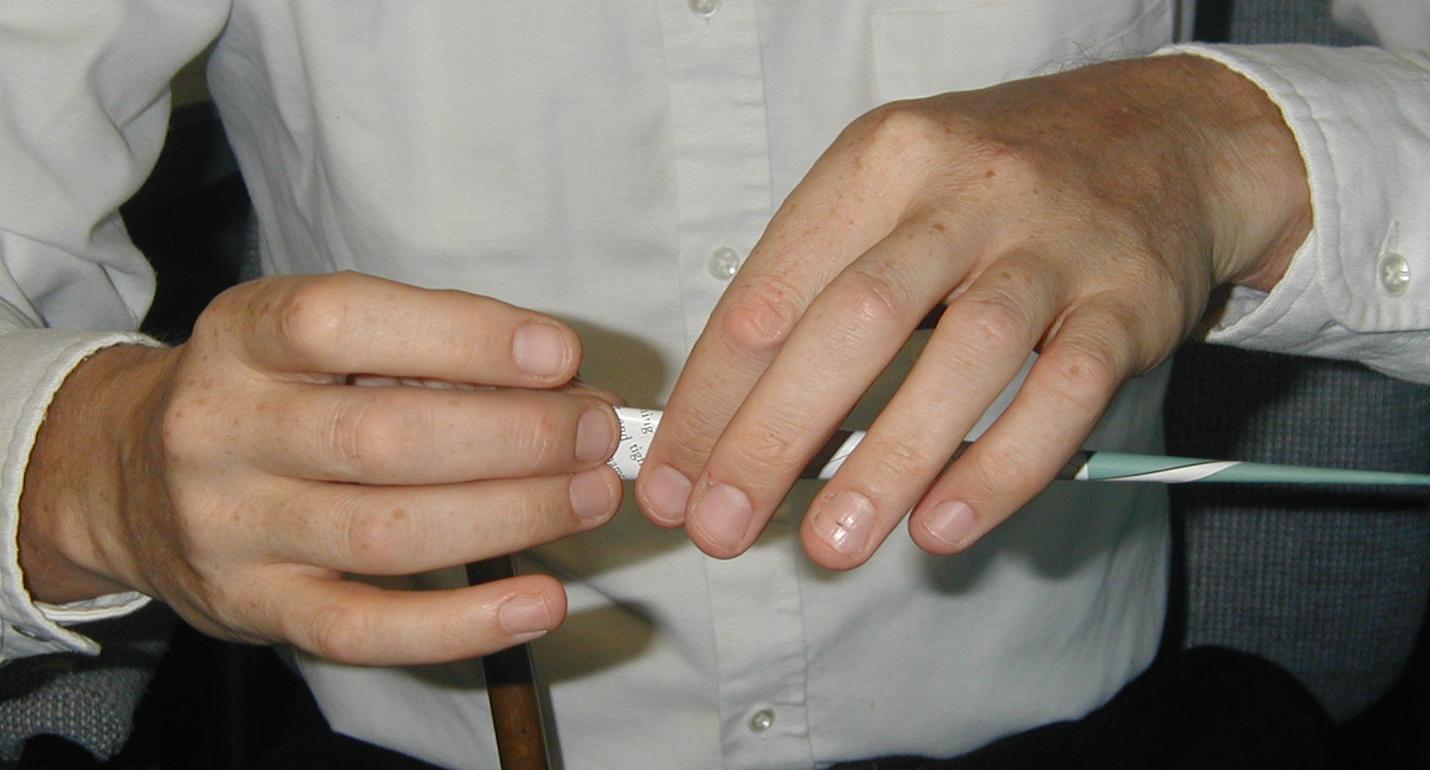
In order to shoot the dart, you must make it fit your blowgun. Put the dart tip-first into the blowgun and mark where it stops with your fingers. Take the dart out of the blowgun, and slide your fingers about a quarter of an inch (6 mm) toward the tip of the dart. This is the point at which you should truncate your dart. It's critical to make a straight cut or tear here; diagonal or ragged tears tend to make the dart unstable in flight. When I'm being formal I use a pair of scissors to make the cut, but most of the time I just pinch it tightly and tear . Putting a slight crease into the large end of the dart does no harm and tends to help keep the dart positioned at the rear of the blowpipe if you wish to carry it before shooting. Load your dart by putting it tip-first into the mouthpiece end of your blowpipe.
If you are an accessories maven, you can make a dart sizer out of a 1/2 inch (12 mm) long piece of the same tubing your blowpipe is made of. I like to attach this to the blowgun with a string tied to a hole in the wall of the sizer. Using it isn't significantly faster or more precise than sizing the dart with the blowpipe itself, however.
You will get considerably more range and power out of your blowgun if you tongue your shots. Instead of simply blowing into the end of the blowpipe, try saying "Tuh!" as percussively as you can to shoot.
A properly made dart, fired straight up, should fly for close to 5 seconds and land upright in dirt. The dart may turn over significantly after it has passed its apogee. Darts shorter than about 5 inches (12 cm) are not stable in flight and tend to spiral instead of flying straight. Badly made darts will unroll inside your blowgun ('blow out') as they are shot, forcing all the air out around your lips for a rude sound. Remove them by blowing into the muzzle, or by swinging the blowgun by the muzzle. You seldom have to put a stick into the blowgun to clear it.
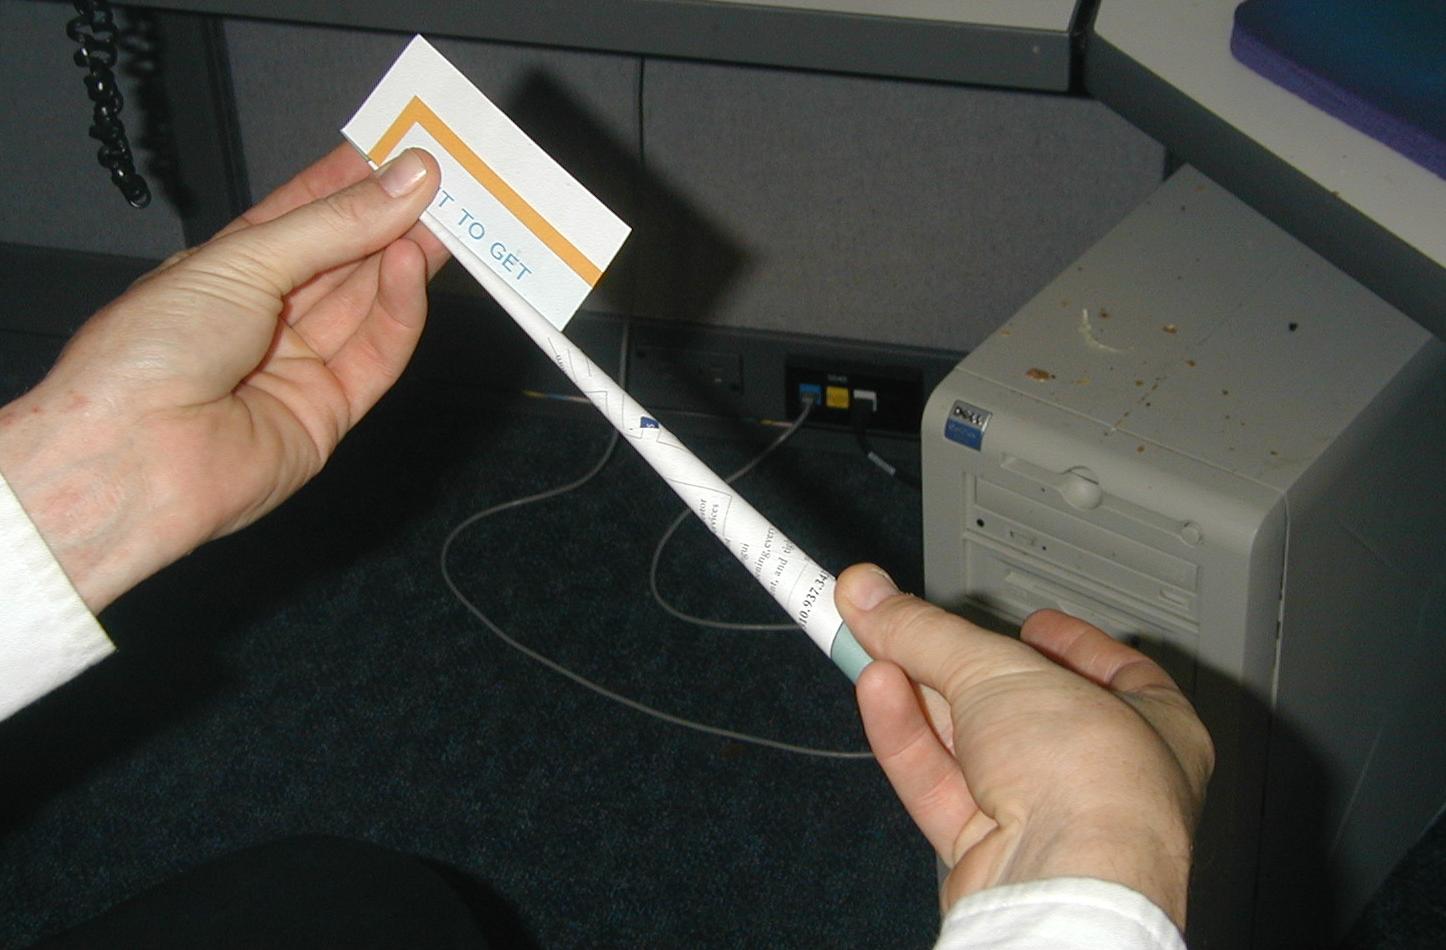
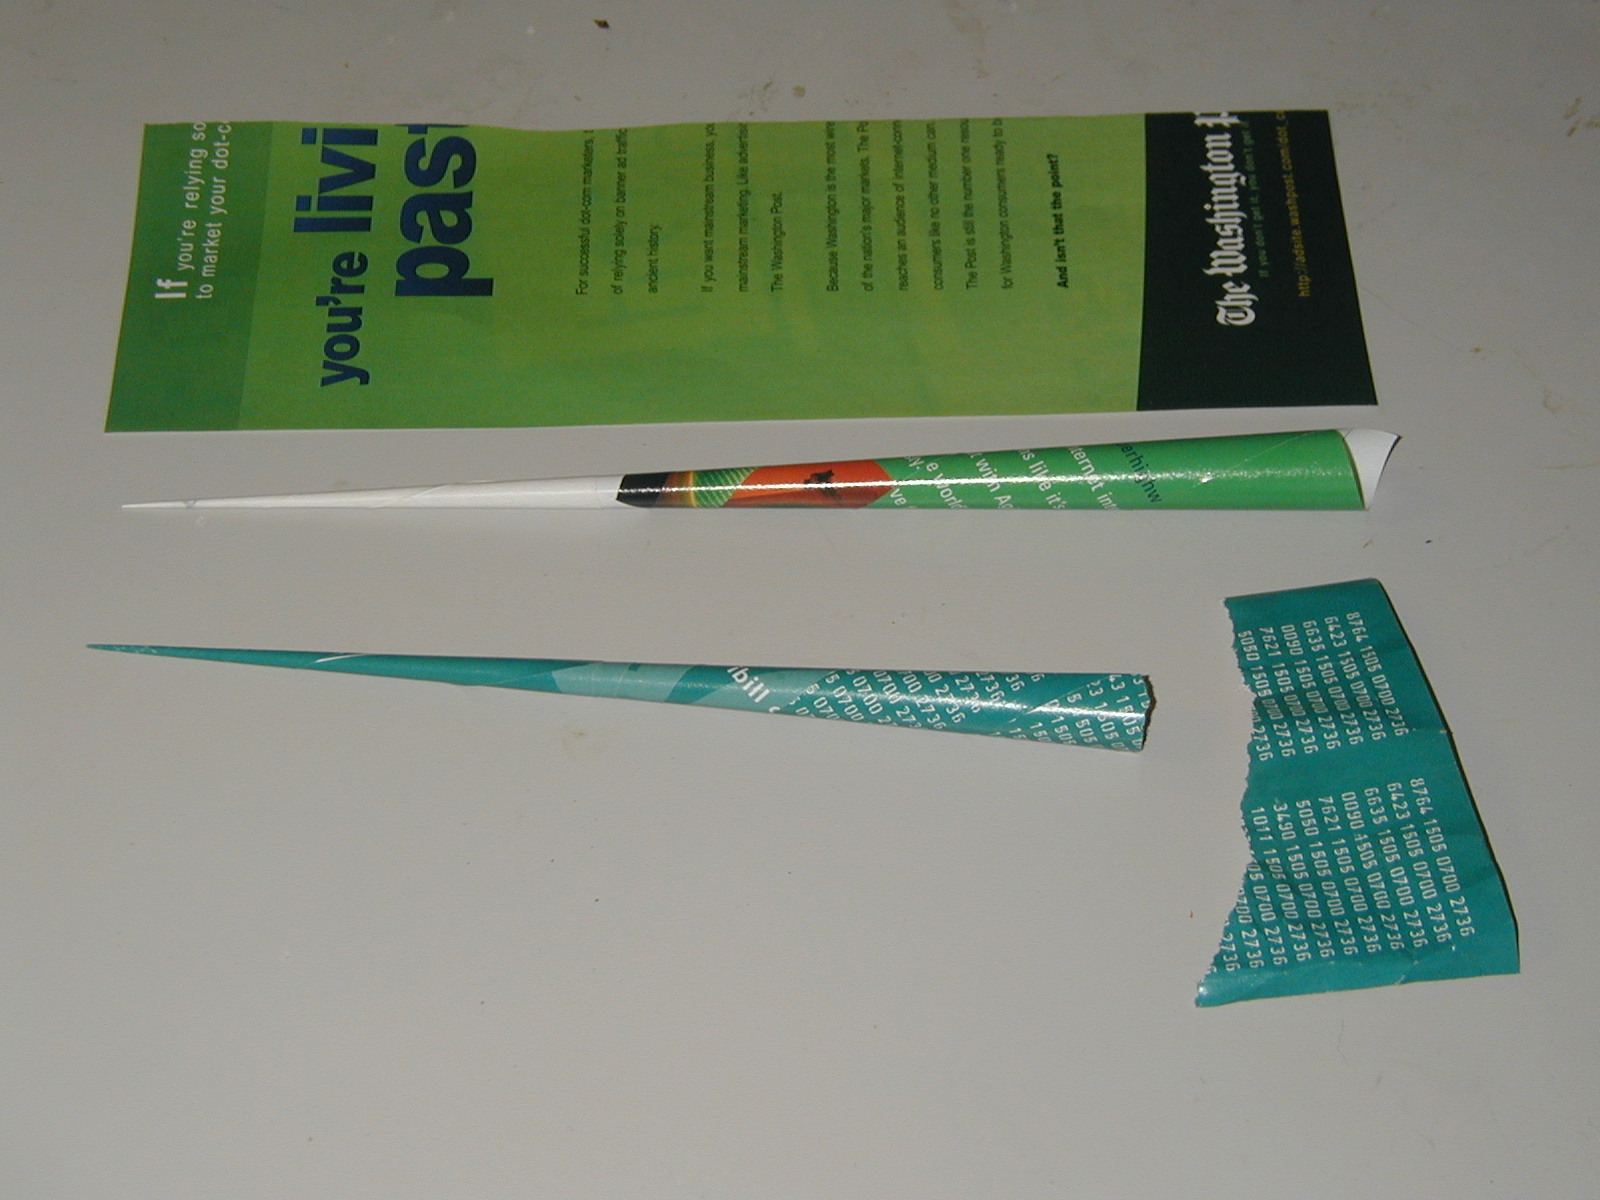
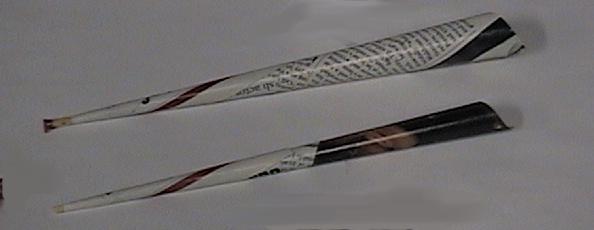
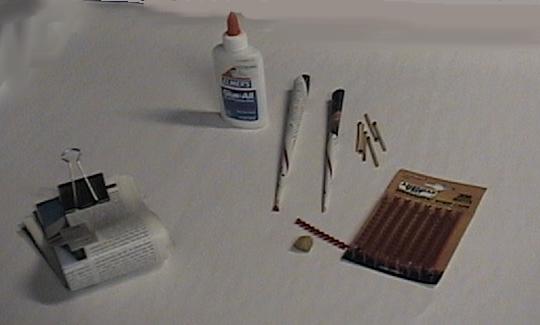
Here you can see a summary picture. At the top is a cut magazine blank, next is a rolled but unsized dart, and at the bottom is a dart cut to fit my blowpipe, along with the piece of paper I removed from it. Keep track of these little pieces of paper; on the ground they are a dead giveaway to where you stood, and in your pockets they show clearly what you've been doing.
Water is the enemy of paper darts. Darts that land in puddles or lakes unroll immediately and can't be re-used. Rain destroys both darts and blanks.
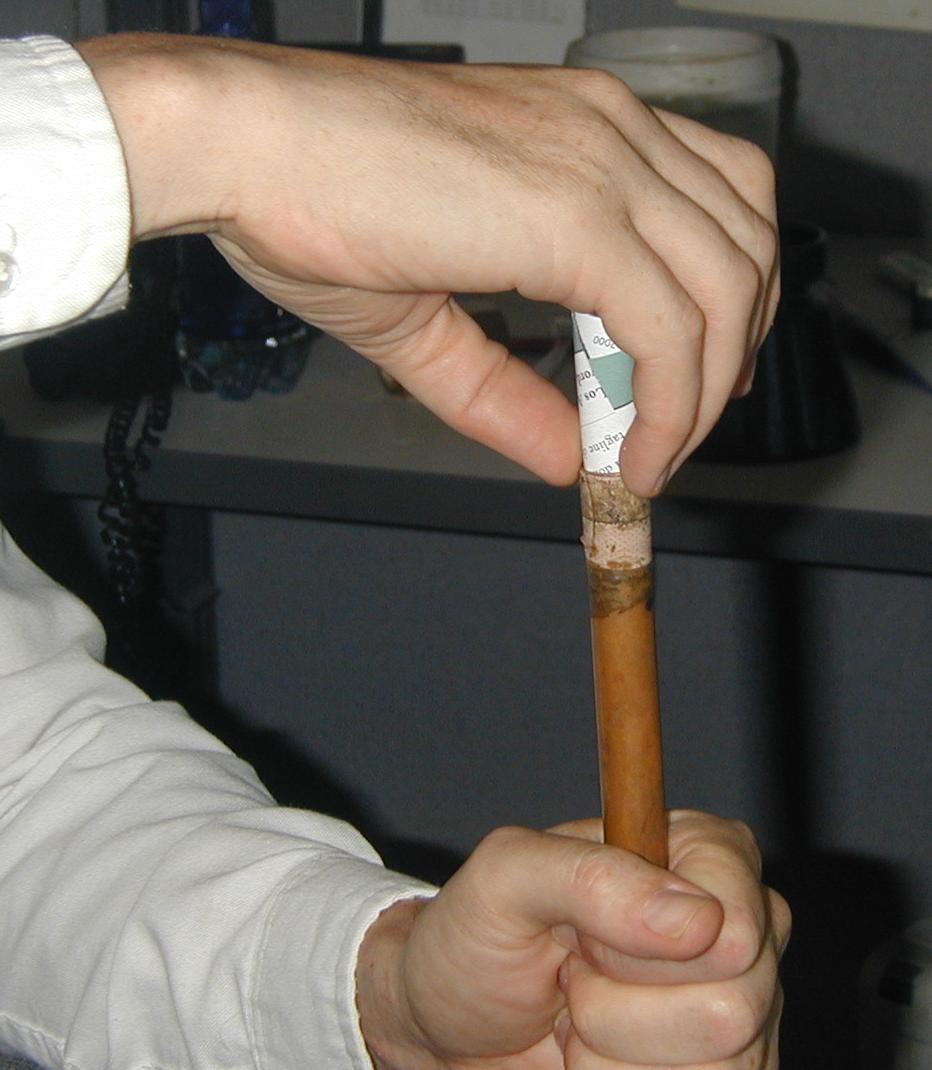
The simplest way to augment your paper dart is to use white glue instead of spit to hold the tip together. This makes a dart that is nearly indestructable after it dries. A good party trick is to stick the tip of a regular paper dart into the back of a lit cigarette butt, then launch it. This tends to stink up your blowpipe, but looks quite pretty at night. Shorter butts tend to be more stable in flight. Don't do this during a drought, of course.
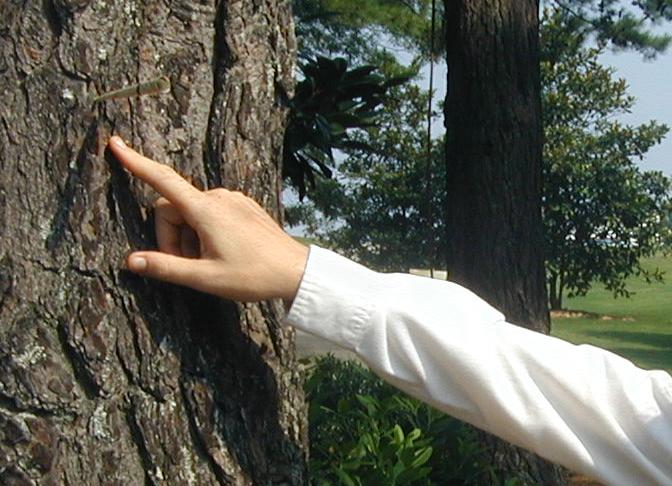
Most other warheads rely on rolling an object into the tip of the dart. Round toothpicks, for example, are strong enough to cause the dart to stick into trees from a distance of 30 feet (10 meters). To put a toothpick into your dart, insert it into the sharp end of your cone as you roll the dart, then keep it there as you pull the the dart tight around it. Start low on your object; as you pull the dart tight, it will tend to swallow the warhead. It's also easy to tear the dart on the inside if you use too much tension as you roll the warhead in. It's possible to stick a warhead dart together with spit, but white glue gives more consistent results. This means, of course, that rolling warhead darts on an ad-hoc basis is difficult.
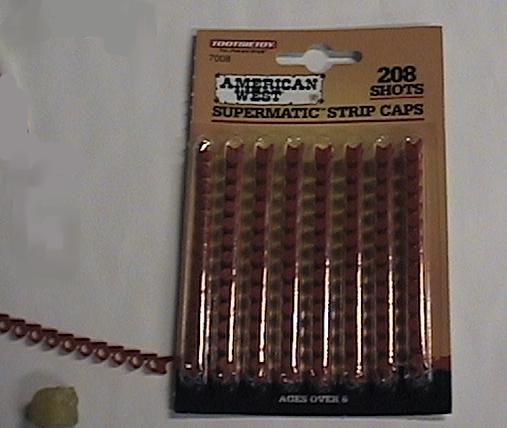
I've tried a variety of warheads besides toothpicks. Strike-anywhere matches will light when they hit hard surfaces, which makes for interesting possibilities. Thimble-style plastic bang caps on top of dead matches will explode on impact, making a nice little noise and flash. Use a little soft wax (the kind used on Gouda cheese works well) on the side of your warhead to stick the cap down; half a match stick works as well as a whole one for this. Here is all the equipment you need. If you intend to light matches against concrete from close up, or from a long vertical flight, combining these by putting a cap on top of the match head will ensure that the match ignites rather than shattering, as they sometimes do. Small nails and other metallic objects tend to slow the dart significantly, but will stick nicely into things which toothpicks won't dent. Sewing-machine needles may be useful for carrying poison, but few toxins are sticky and lethal enough to be worth the trouble.